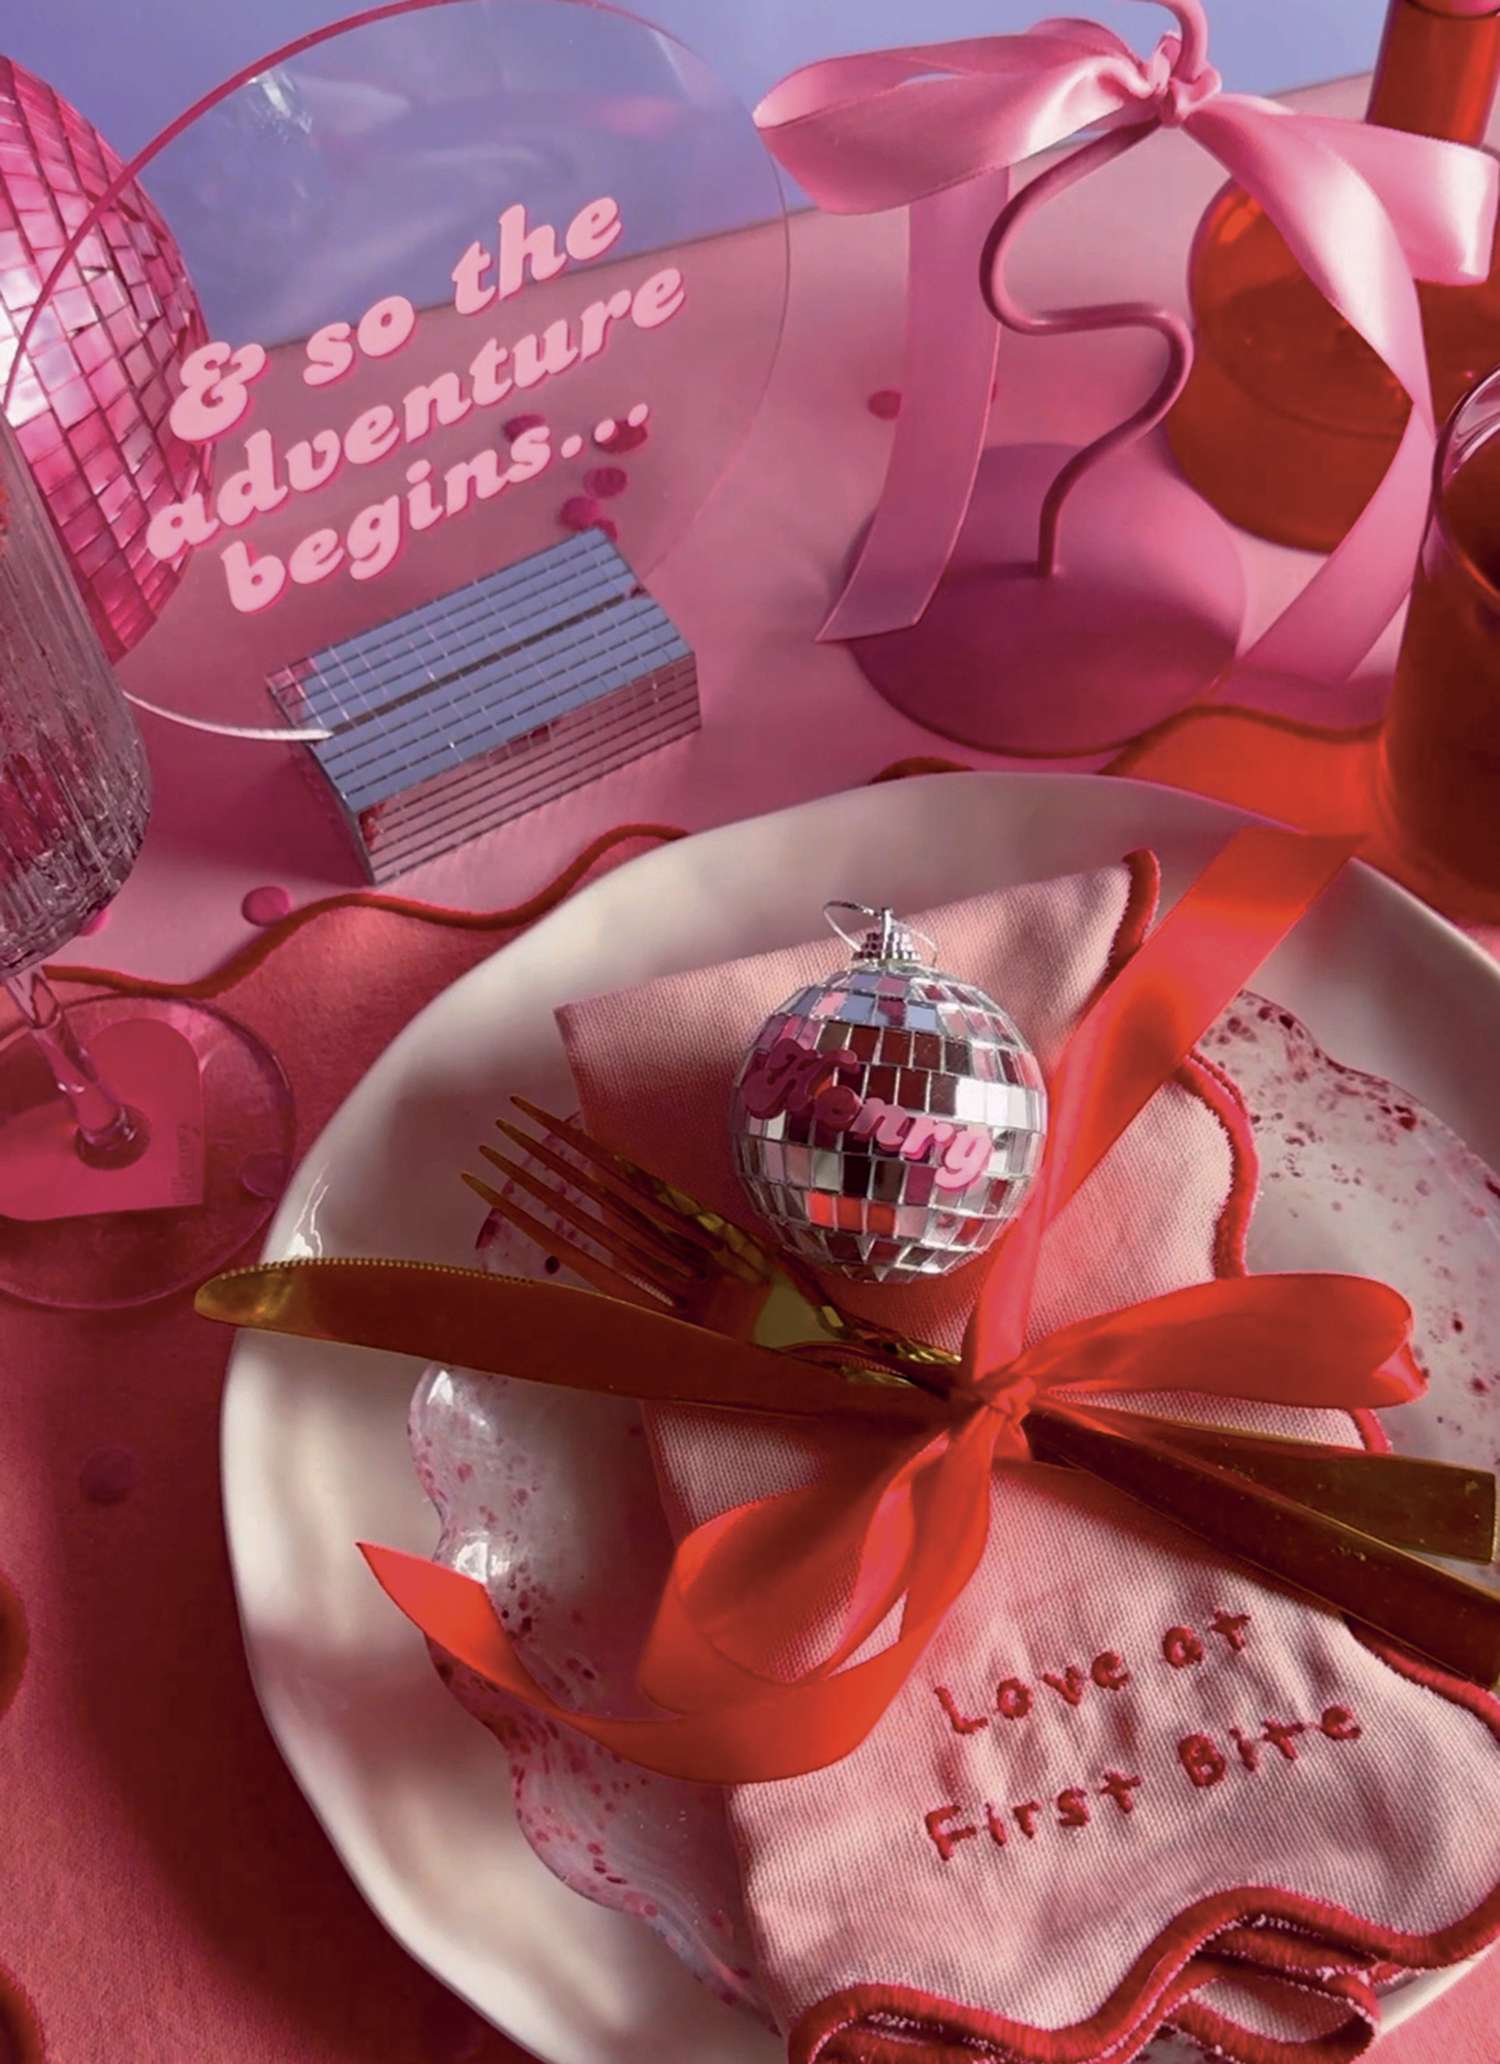
Your wedding day is the ultimate celebration – make it as groovy and unique as you, with the help of Cricut™, pioneers in home crafting and smart cutting technology. Embrace your inner disco queen and create a wedding that dazzles with personality and pizazz. Ditch the ‘cookie-cutter’ wedding, and let disco fever inspire you. Craft personalised mini disco ball table settings for your nuptials with a little help from a Cricut digital cutting machine. Armed with just a handful of supplies, you can make all of your creative designs come to life and have a wedding that is 100% you!
YOU WILL NEED
♥ Small disco balls
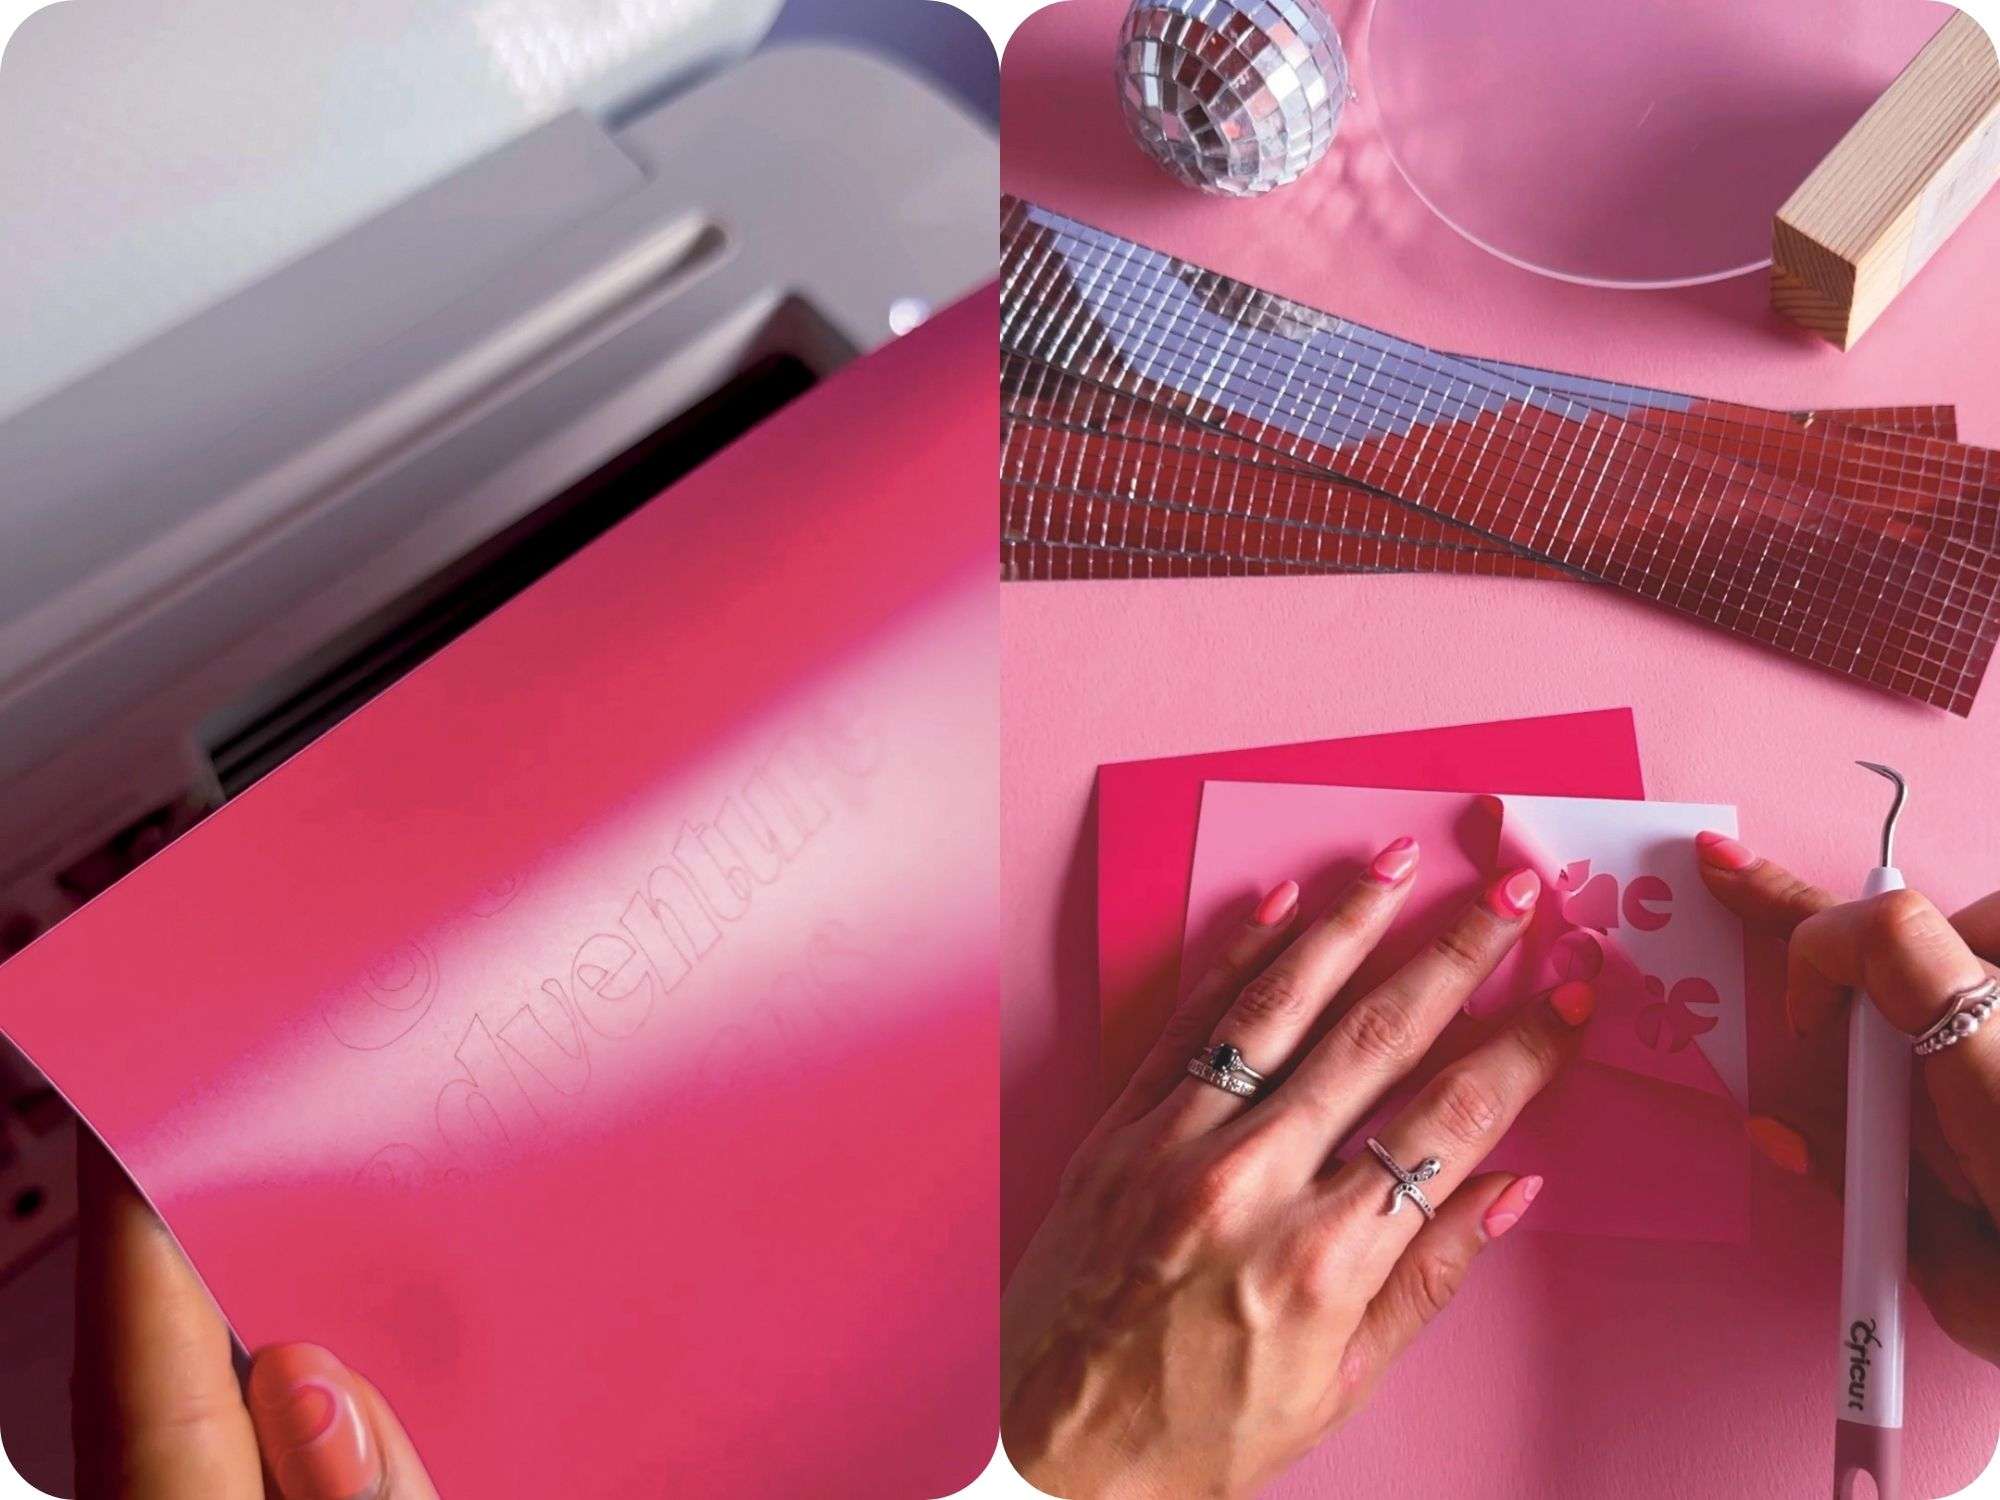
♥ Adhesive mirror mosaic tiles
♥ Card
♥ Blank table sign or empty picture frame
♥ Foil and Cricut foil tip (optional)
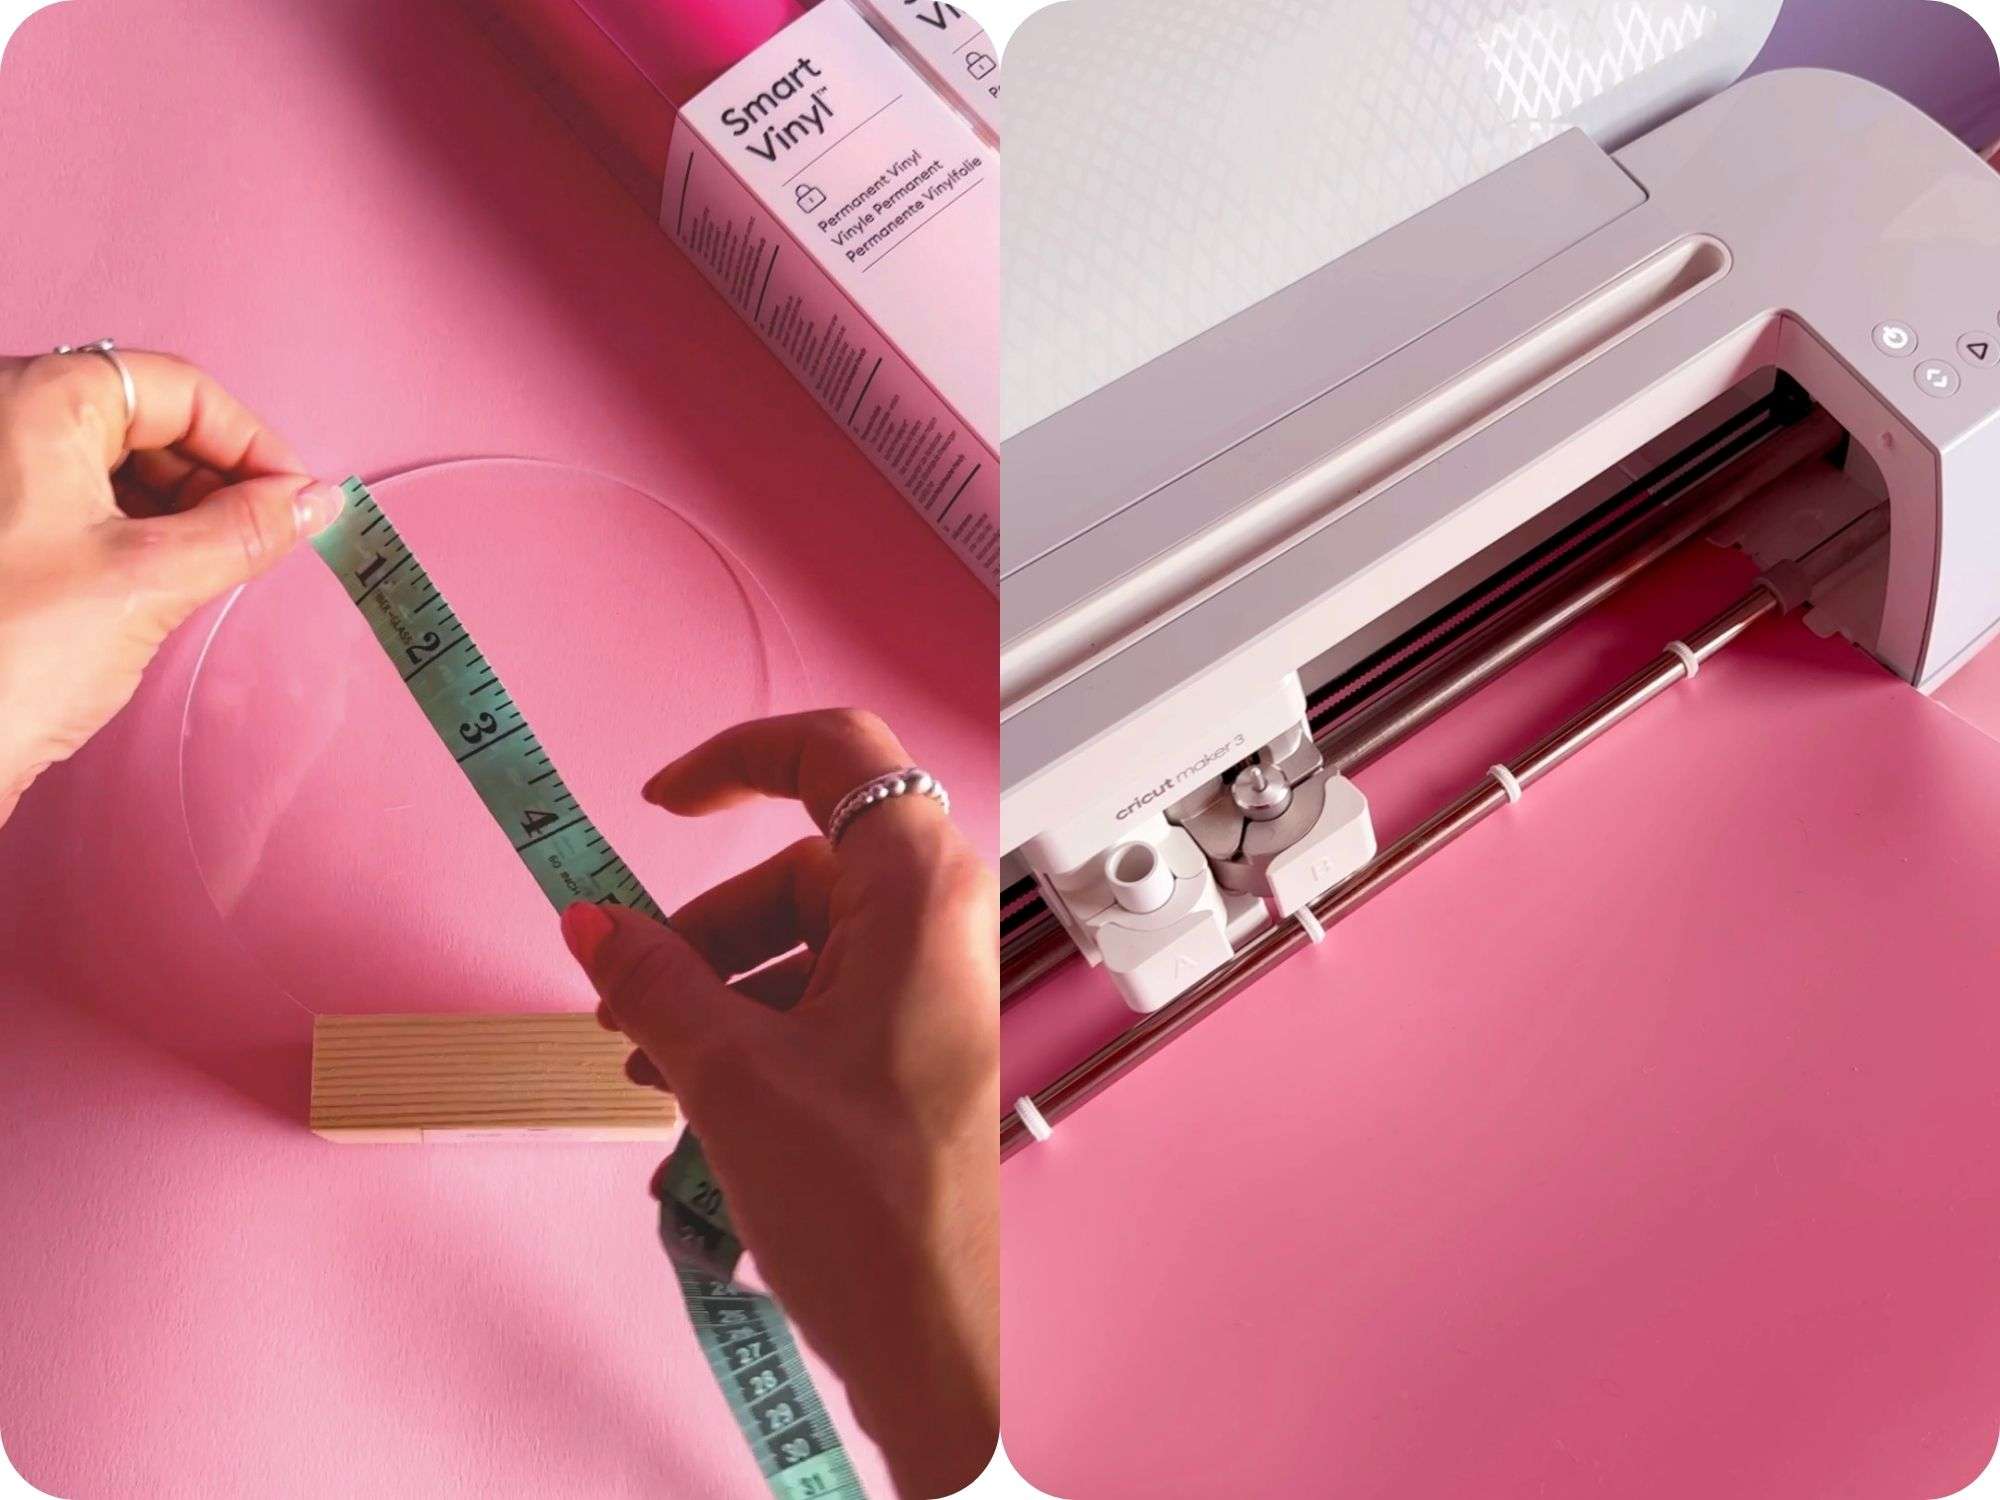
♥ Vinyl in two shades
♥ Transfer tape
INSTRUCTIONS
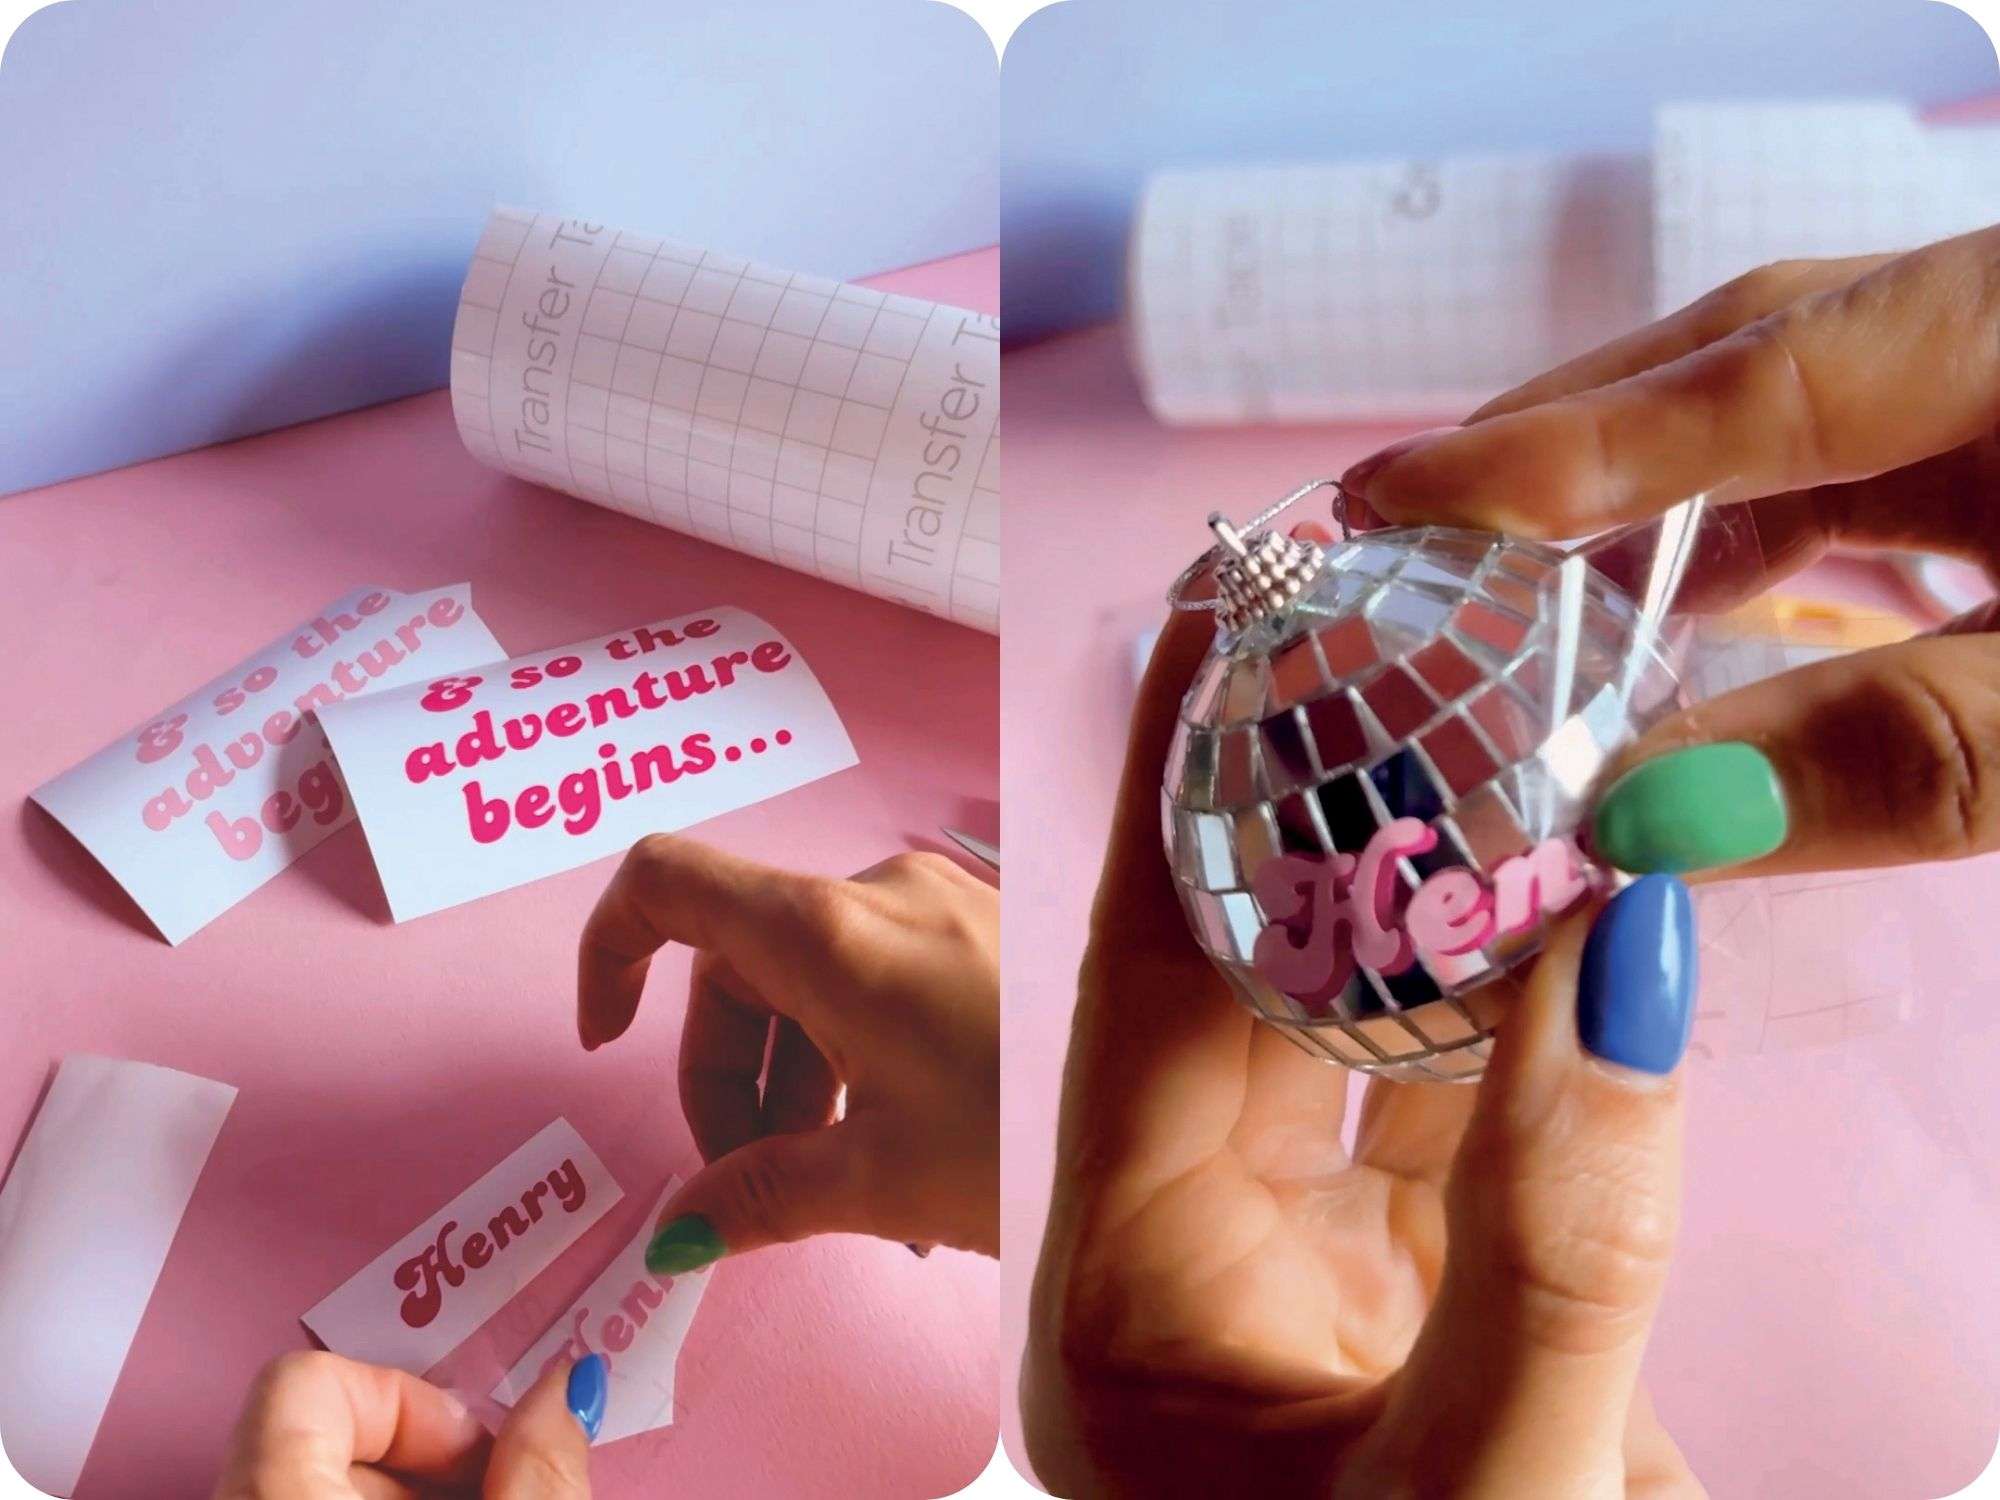
1: Measure disco balls and type out guests’ names.
2: Measure blank sign/picture frame and pick/type out a quote or table number.
3: Type each name or quote in the Design SpaceTM app and duplicate so you have two of everything, change the colour on one of each item (you’ll be cutting everything twice, once for each vinyl colour).
4: Cut your designs on your Cricut and then ‘weed’ out any unwanted bits.
5: Use transfer tape to remove one design/name from its backing, then place this on top of the same design/name on the other coloured vinyl making sure you’re slightly offset to create a shadow effect.
6: For the disco ball place settings/favours, you can now use your transfer tool to rub the vinyl names on and peel back the transfer tape.
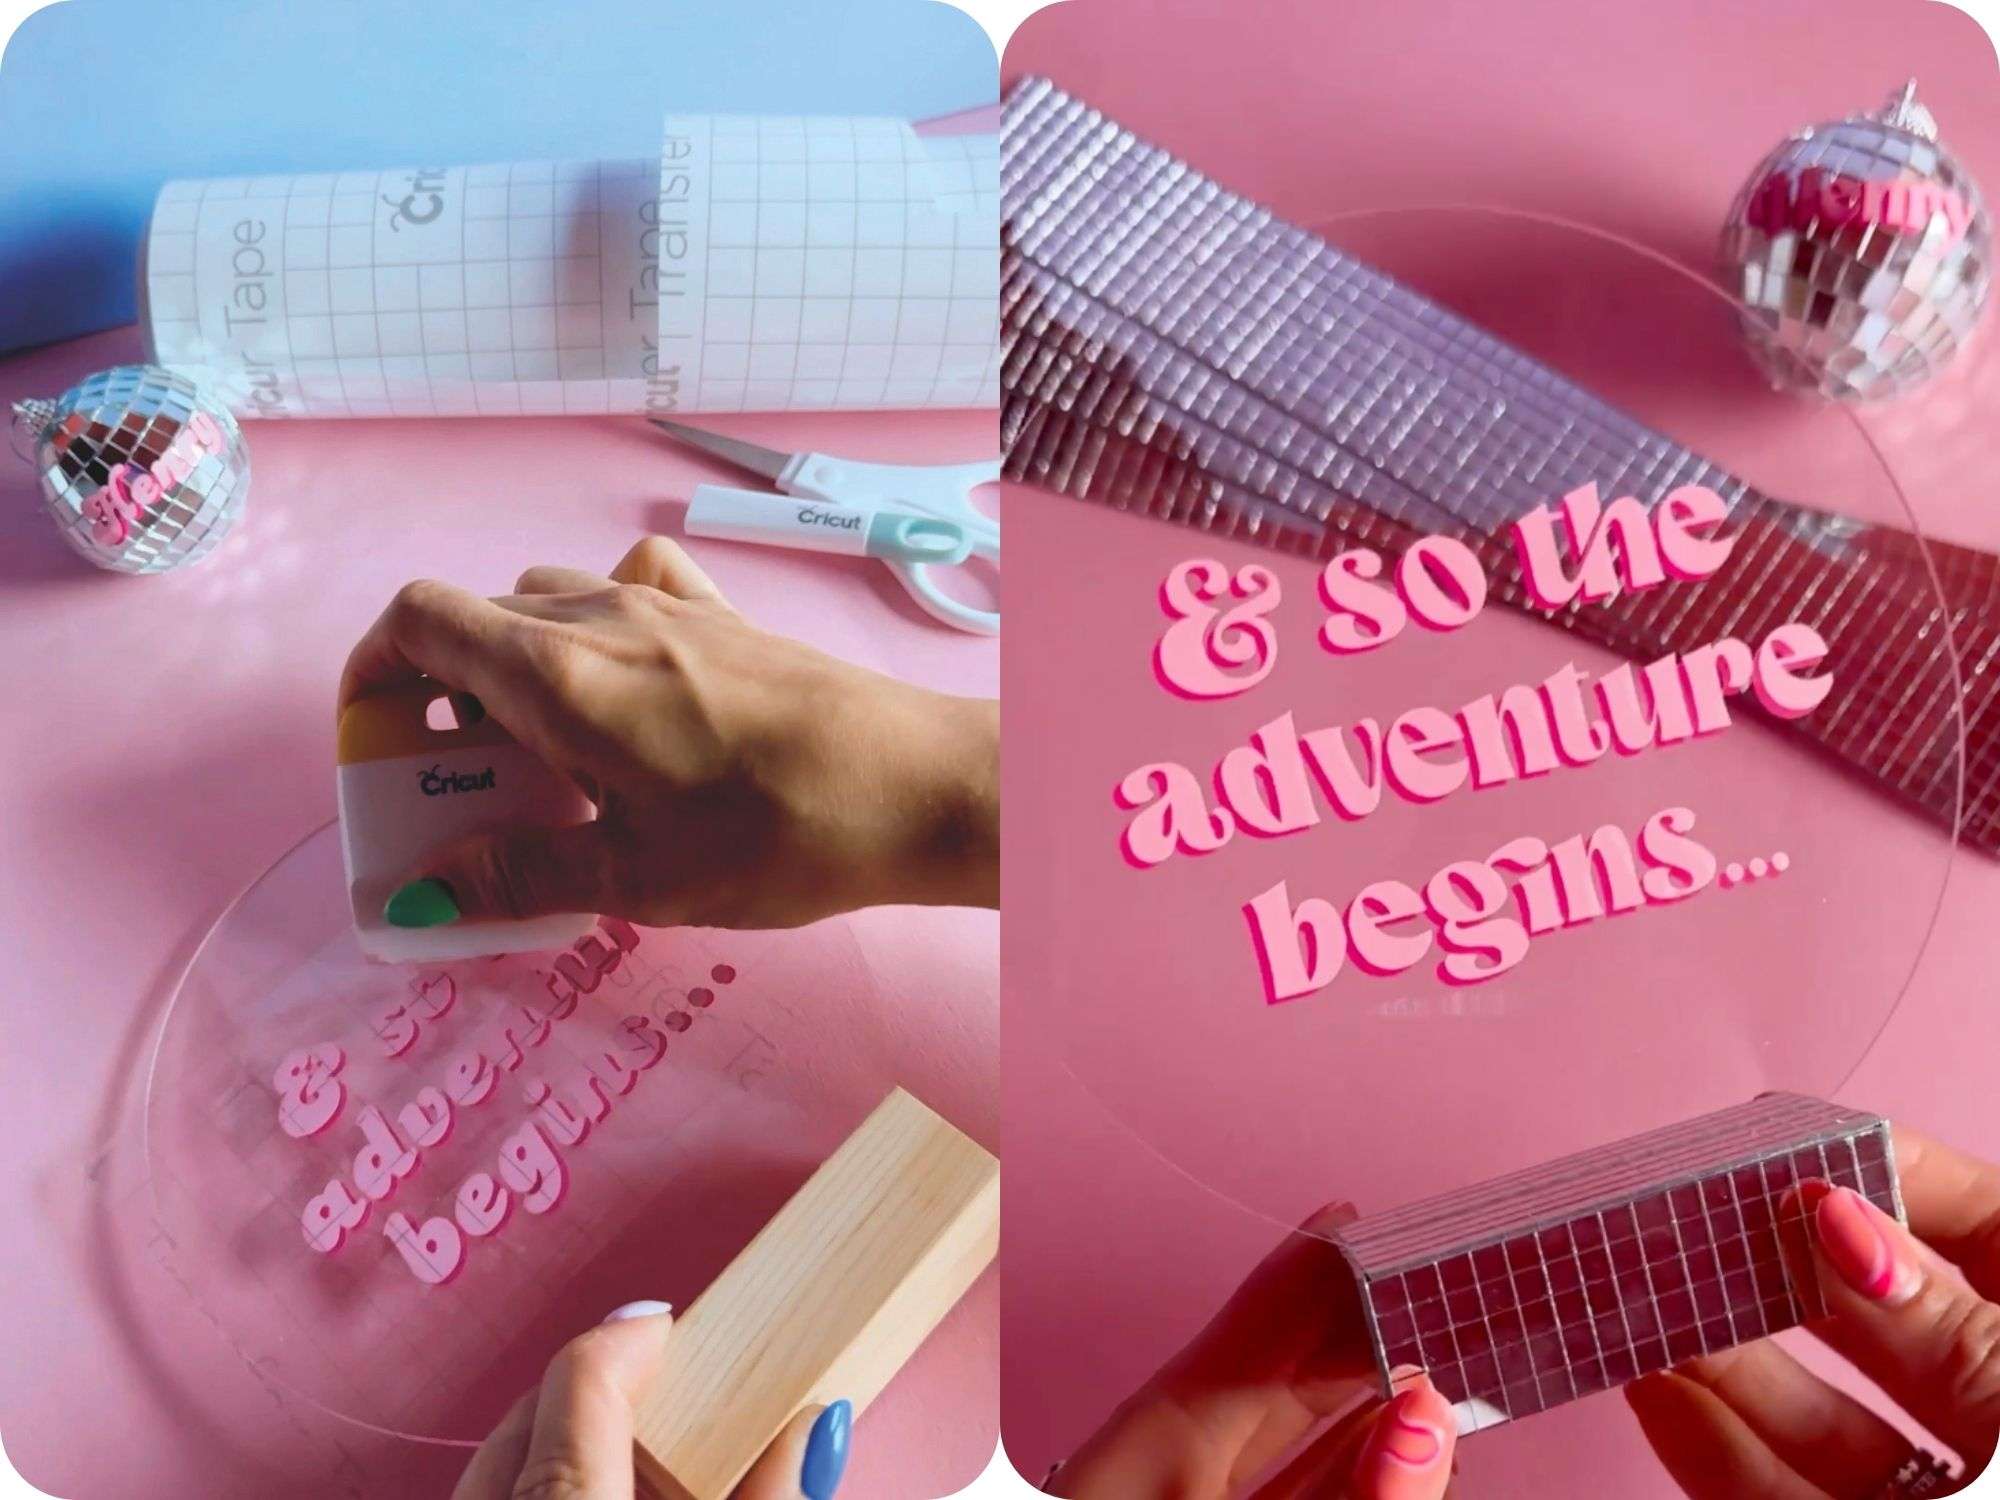
7: For your table sign do the same.
8: Use your adhesive mirror mosaic tiles to decorate the base or frame and then style your table.
Idea: Use this technique to create signs for your table plan, gift table and photo booth. Decorate large disco balls and have them scattered around the venue to create a cohesive look and the magical day you’ve always dreamed of.